Objective

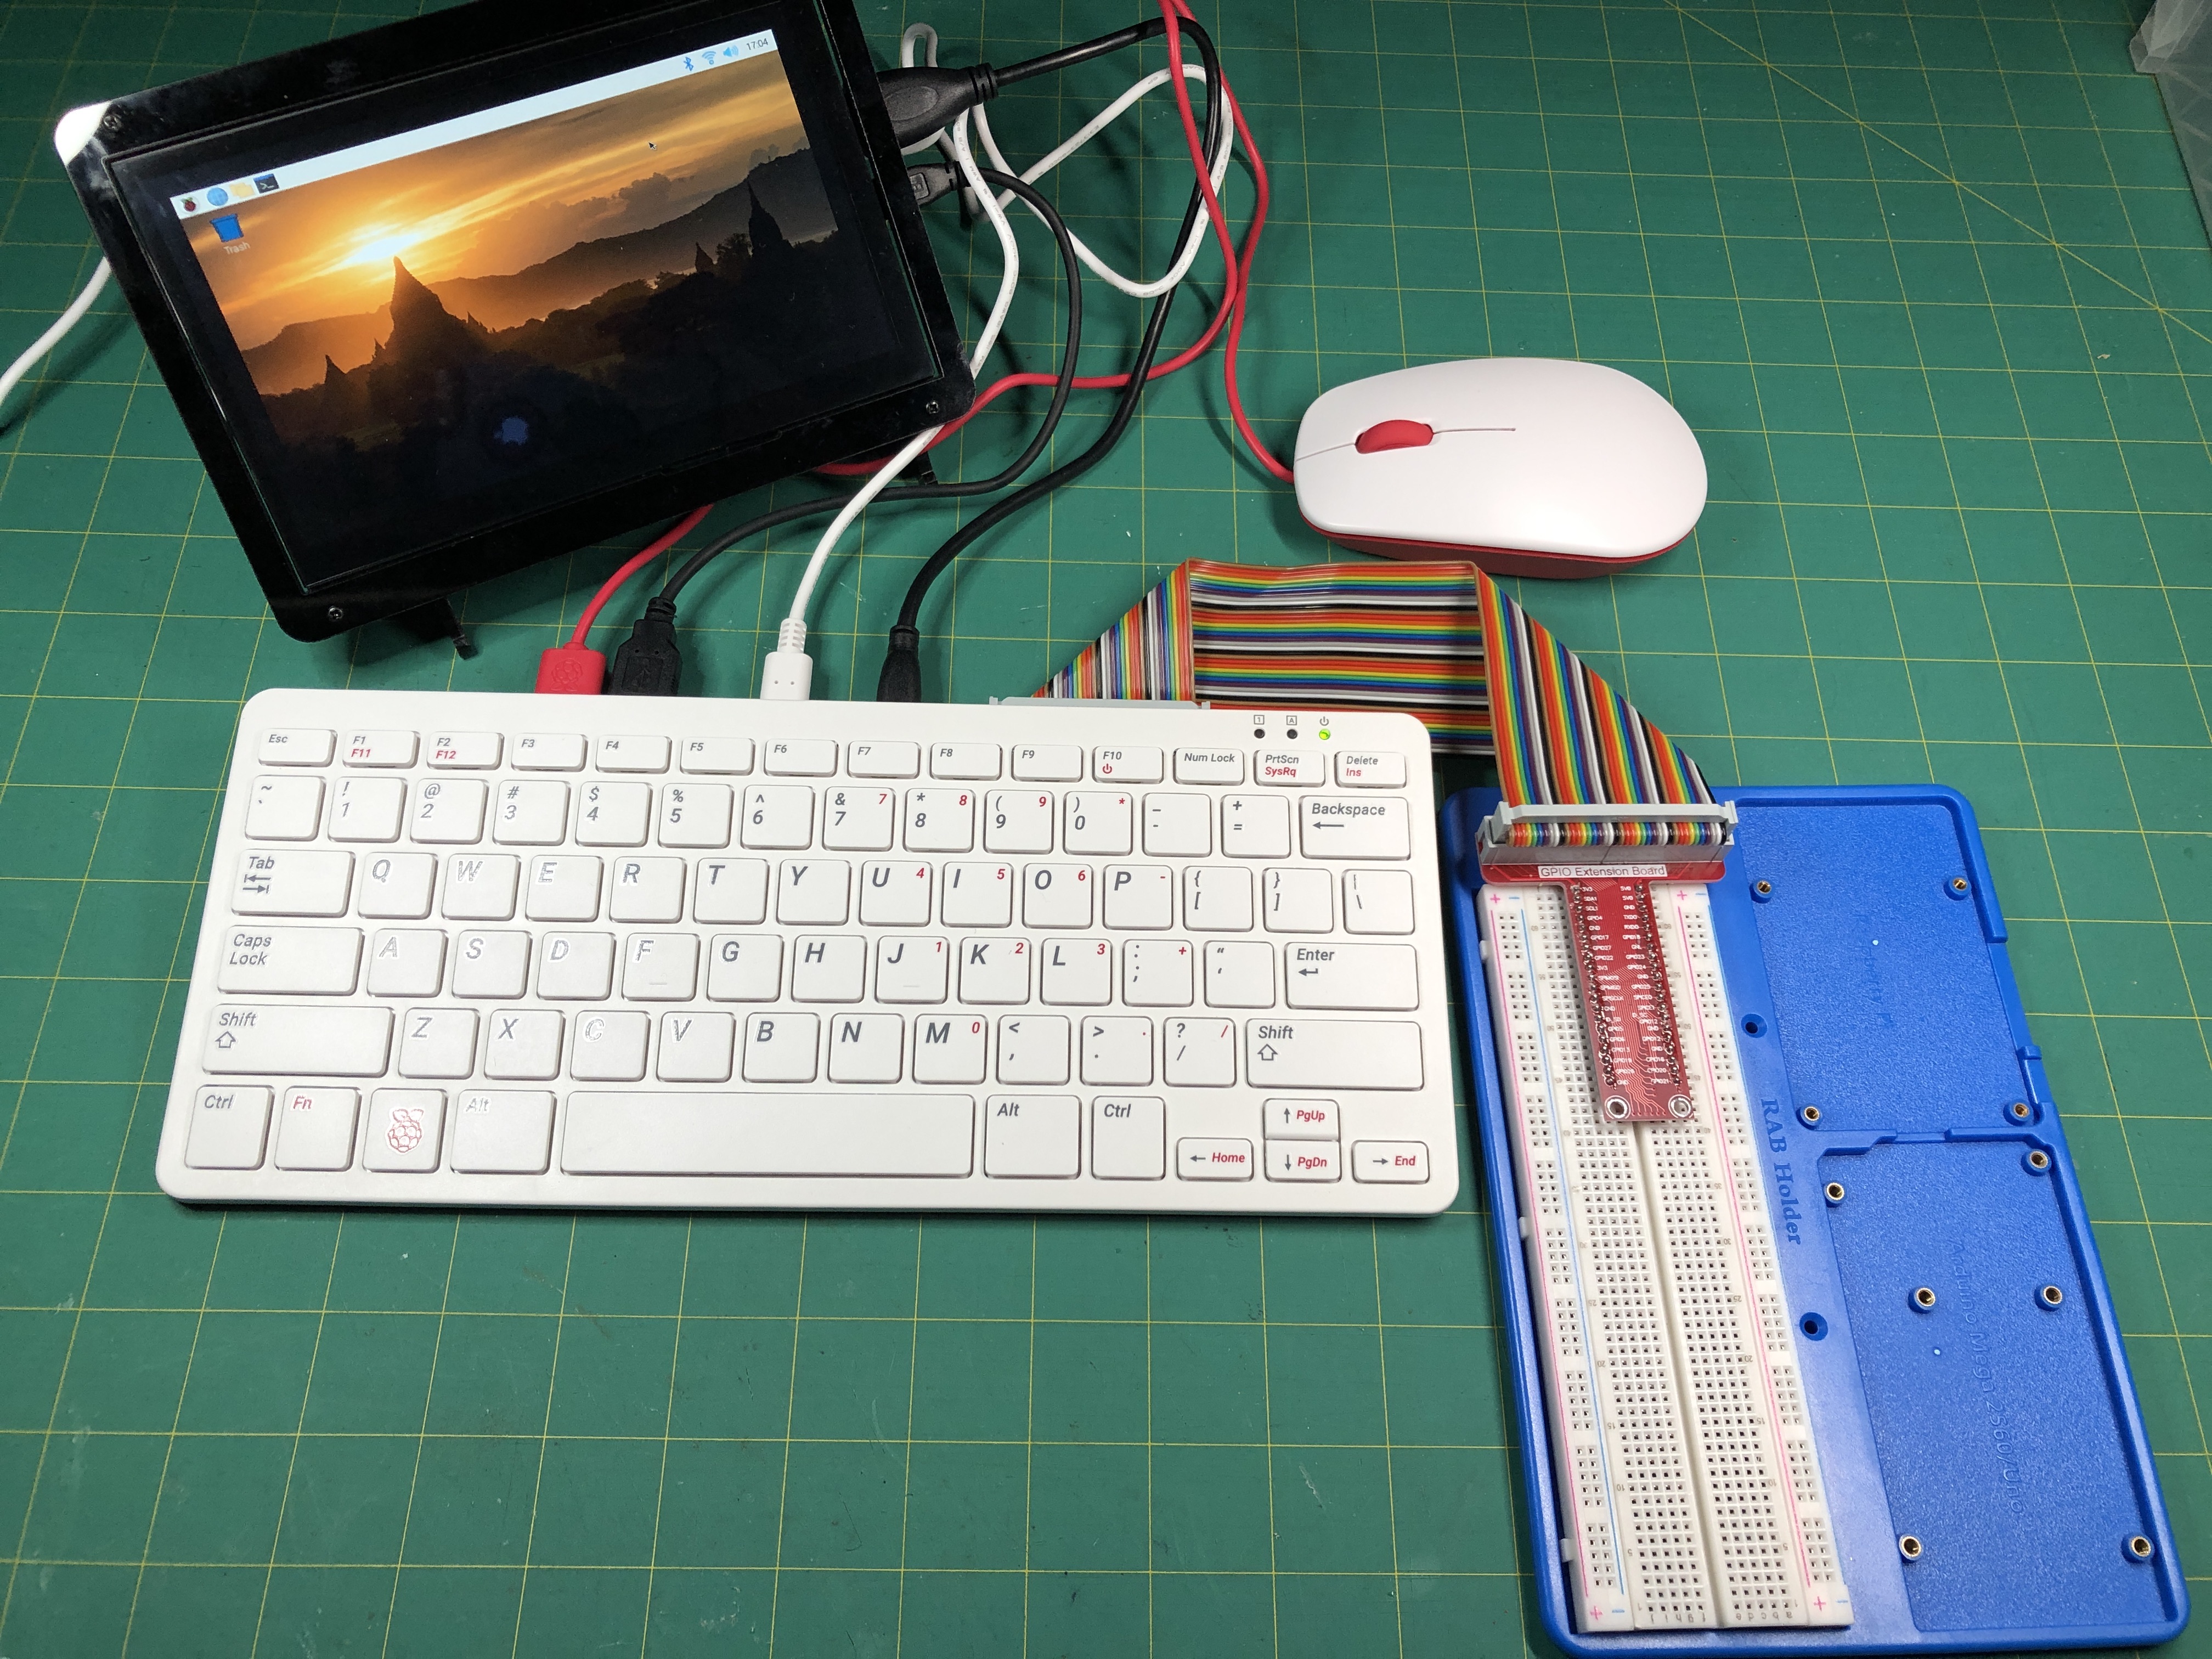
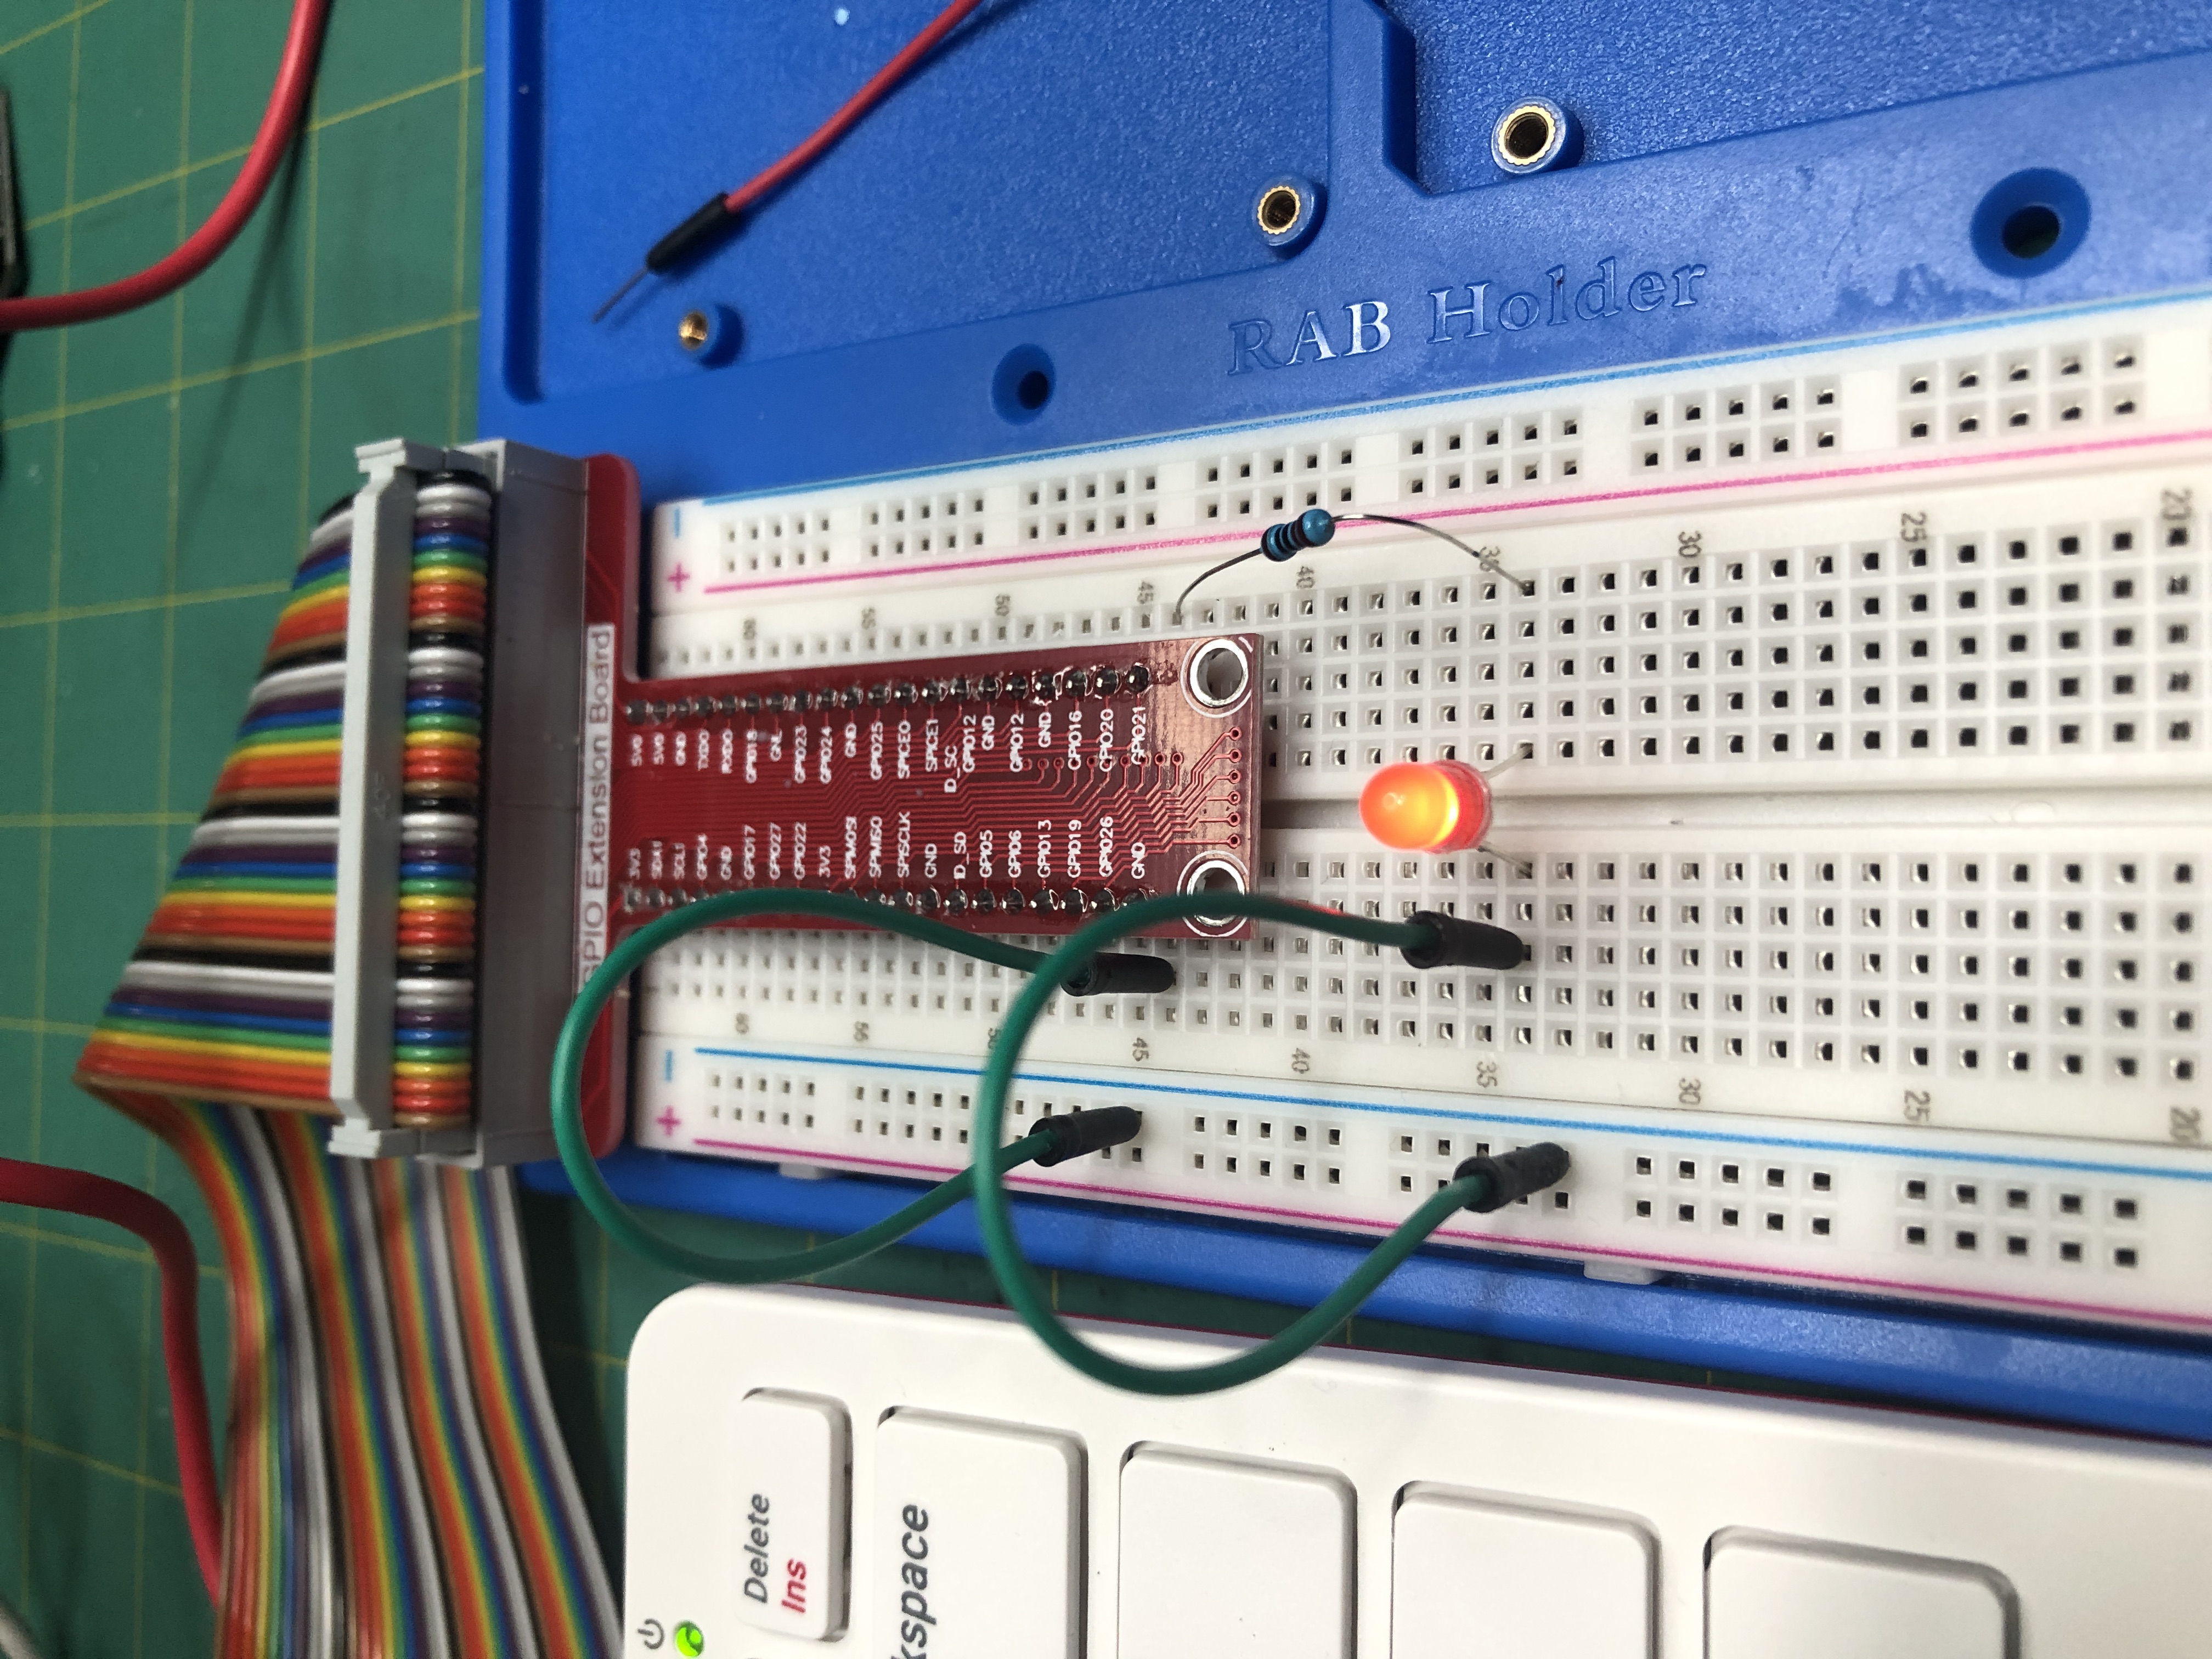
In this session, the student will connect the RPi 400 to a breadboard using an extension cable and GPIO breakout board. The student will then connect a led and resister to a GPIO pin and programmatically make it blink.

GPIO Breakout and Breadboard Installation

⚠ NOTE: When Connecting/Disconnecting the Cyberdeck and/or Enviro+, shutdown and UNPLUG the RaspberryPi 400 first!
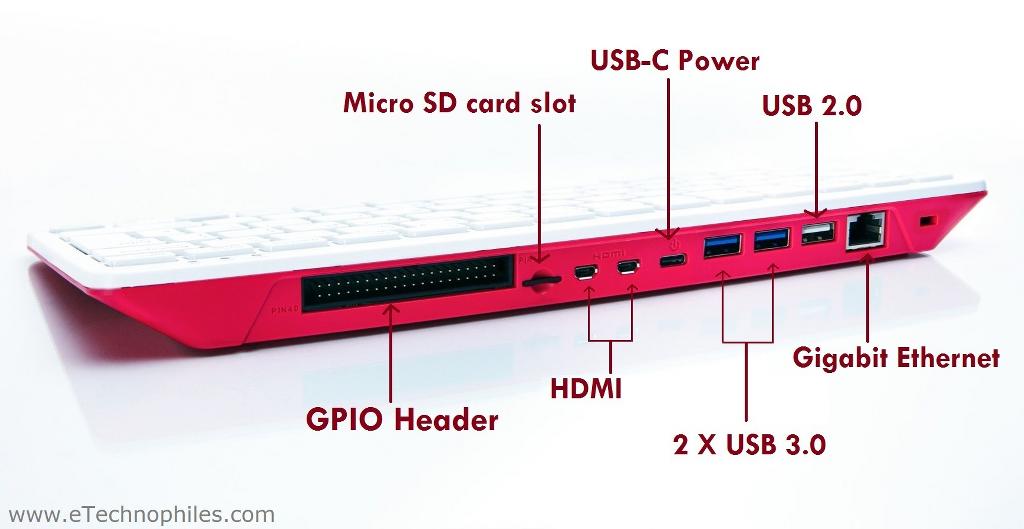
Needed Materials:

Sunfounder Kit (Includes: breadboard, jumper wires, leds, mounting plate, GPIO breakout board, gpio header extension cable
RaspberryPi 400
RaspberryPi 400

Final Product:

RPi with GPIO Breakout and electronics breadboard
LED inserted into electronics breadboard

Video Walk Through

Breadboard RPi GPIO Extention Install on RPi

[YouTube Link]

Breadboard RPi Install with Better Cable Placement

[YouTube Link]